


A Little Gift Box with Big Holiday Charm
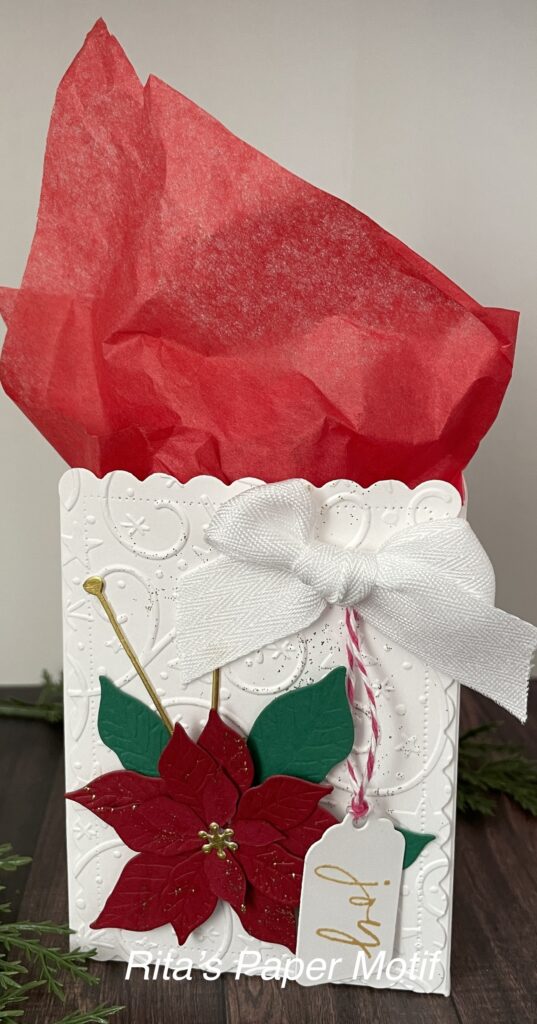
There’s something magical about small gift boxes during the holidays. They’re quick to make, endlessly useful, and they turn even the simplest little treat into a moment of joy. Today’s project is one of those “stash‑friendly wins” that works any time of year but feels extra special at Christmas.
This box features the Swirl of Magic Embossing Folder, which adds that soft, winter‑wind texture I can’t get enough of. And let’s talk about Gold Stickles — I swear they’re the easiest way to add sparkle without overpowering your design. A tiny dab here and there, and suddenly your project looks like it’s catching the glow of Christmas lights.
I kept the embellishments simple: a bold poinsettia, a crisp white bow, and a tiny tag that brings the whole look together. It’s the kind of project that looks detailed but comes together quickly, making it perfect for holiday batching
To Make Your Own
✂️ Measurements & Supplies
- Basic White cardstock: 10” x 6‑¼” (166780).
- Score at 1‑½” on both sides of the 6‑¼” edge.
- Score at 4‑¼” on both sides of the 10” edge.
- (2) Basic White panels: 4” x 5” each, cut with the second‑largest scallop die.
- Real Red (102482) or Cherry Cobbler (119685) cardstock: 5” x 6”.
- Peaceful Pines cardstock (167691) : 3‑½” x 4”.
- Small scrap of gold foil.
- White ribbon: approx. 9” (enough for a bow).
- Scraps of Basic White for a tag.
- Swirl of Magic embossing folder. (168179)
- Paint brush + Gold Stickles.
- Pretty Poinsettia dies (168146).
- Flowering Meadows dies (for gold foil stem accent).
- Tag die (any style you prefer).
- Golden Glow ink (167676).
- Frosted Pinecones stamp set (168369).
🛠️ Assembly Instructions
- Create the box base
- With the 10” side facing up, cut along the score lines to the intersecting score.
- Miter the tabs you’ve created, then repeat on the opposite side.
- Fold along all score lines.
- Add adhesive to the tabs and secure to one long side, then repeat for the other.
- Adhere the remaining sides to complete the box.
- Prepare the panels
- Die‑cut both 4” x 5” panels with the scallop die.
- Emboss with the Swirl of Magic folder.
- Using a paint brush, lightly apply Gold Stickles to highlight the embossed design.
- Set aside to dry.
- Create the poinsettia
- Die‑cut petals and leaves with the Pretty Poinsettia dies.
- Assemble into a layered flower.
- Cut a stem from gold foil using the Flowering Meadows die and tuck it behind the poinsettia for extra detail.
- Make the tag
- Die‑cut a tag from Basic White scraps.
- Stamp the sentiment “Joy” using Golden Glow ink and the Frosted Pinecones stamp set.
- Final touches
- Attach embossed panels to the box front and back.
- Add the poinsettia and gold accents.
- Tie a bow with white ribbon and adhere.
- Finish with your stamped tag.