


Have you ever fallen in love with a piece of Designer Series Paper and wanted it to be the star of the show? That’s exactly what we did during this week’s live crafting session! Using the beautiful Stitched Season Designer Series Paper, I created a festive W-Fold card that puts those gorgeous Christmas patterns front and center while still leaving plenty of room for stamping and embellishing.

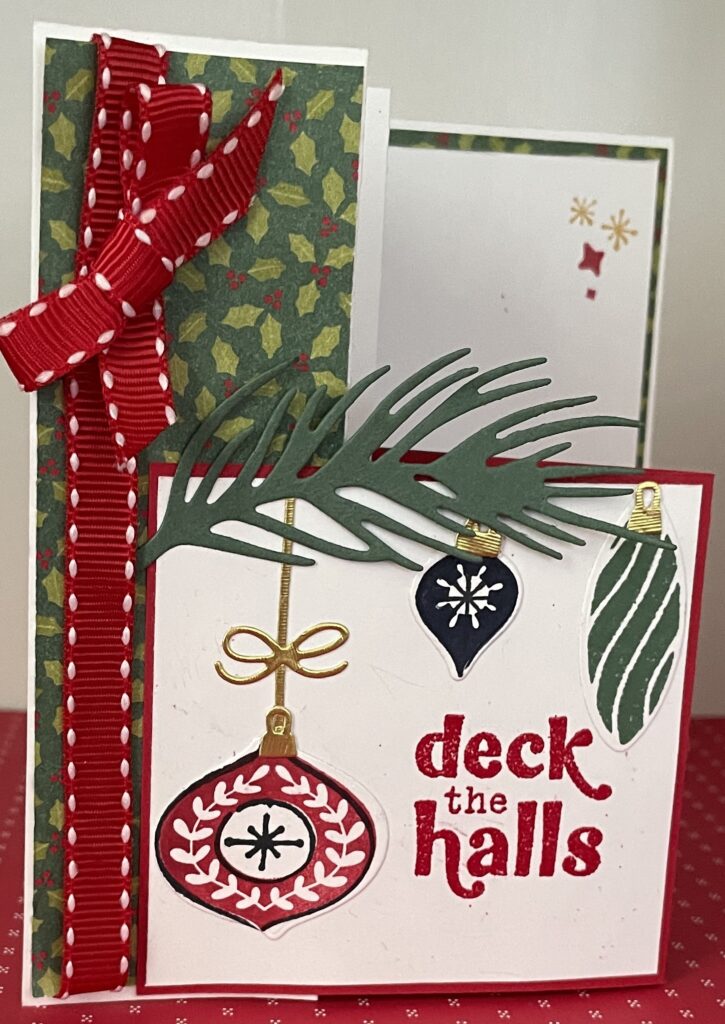
One of my favorite things about this fold is that it looks impressive when displayed, but it’s surprisingly simple to create. Once you understand the score lines, the folded card naturally forms a “W” shape that creates multiple panels for decorating.
Why I Love This Fold
The W-Fold card is perfect when you want to:
- Showcase several patterns of Designer Series Paper
- Create dimension without complicated techniques
- Make a card that stands beautifully for display
- Use up coordinating paper scraps
- Add a fun interactive element to your handmade cards
For this Christmas version, I paired traditional Real Red, Basic White, and metallic accents with greetings from the Festive Cheer Stamp Set. The touches of Timeless Metallic Specialty Paper add just the right amount of holiday sparkle.
Measurements
Card Base
- 5-3/8″ x 11″
- Score on the 11″ side at:
- 1-3/4″
- 3-1/2″
- 5-1/2″
- 7″
Fold along the score lines to create the W shape.
Front Element
- Real Red cardstock: 6-1/2″ x 3-1/4″
- Score at 3-1/4″
Front Panel Layered on Front Element- where sentiment sits
- Basic White cardstock: 3″ x 3″
Inside Insert
- Coordinating cardstock or DSP: 3-3/4″ x 5-1/4″
- Basic White cardstock: 3-1/2″ x 4-3/4″
Decorating Strips
- (4) pieces measuring 1-1/2″ x 5-1/4″
Supplies Used
- Stitched Season Designer Series Paper
- Real Red Cardstock (#102482)
- Basic White Cardstock (#166780)
- Festive Cheer Stamp Set (#168126)
- Festive Cheer Dies (#168132)
- Timeless Metallic Specialty Paper (#168548)
- Golden Glow Ink (#167676)
- Real Red Ink (#147085)
- Night of Navy Ink (#147110)
- Peaceful Pine Ink (#167679)
- White 1/4″ Ribbon
- VersaMark Ink (#102283)
- Heat Tool (#129053)
- Multipurpose Liquid Glue (#110755)
- Silicone Craft Sheet (#127853)
Make It Your Own
One of the best things about this card design is how easily it adapts to different themes. During the live, I also shared a Halloween version created with the same measurements and fold design using the Halloween Memories Scrapbook Workshop Kit.
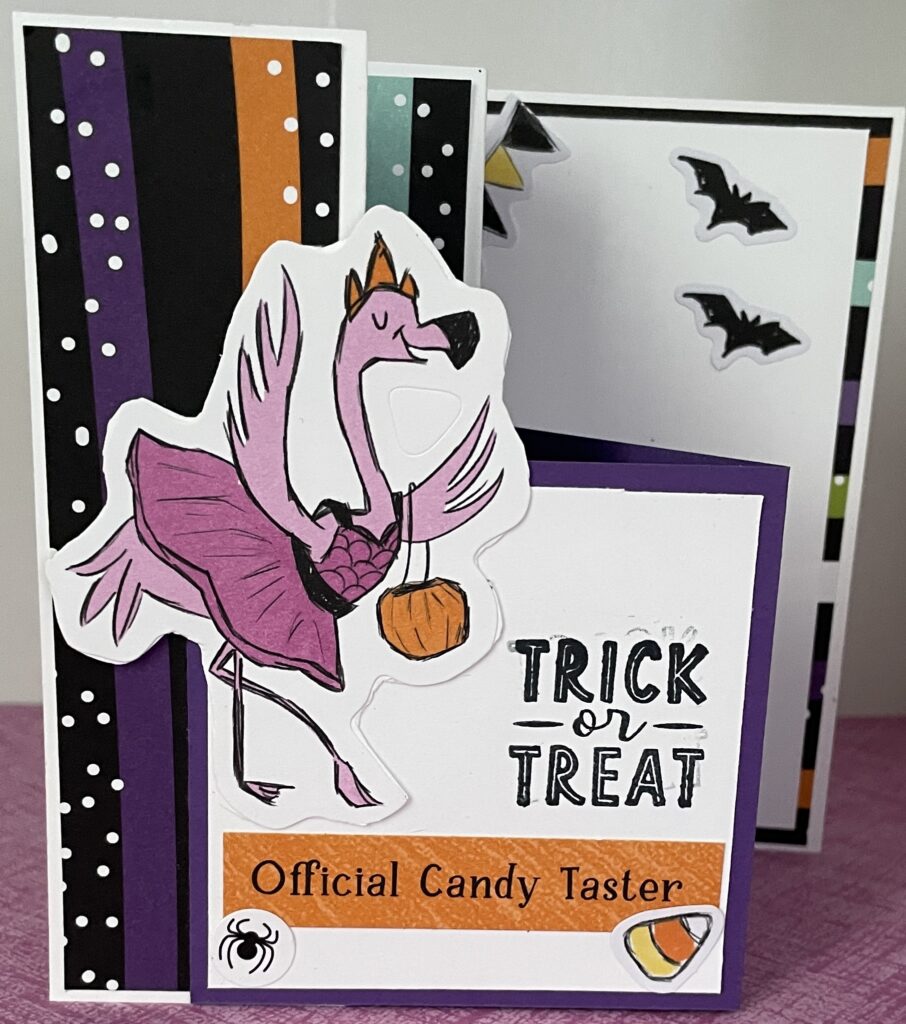
That’s the beauty of a good card sketch or fun fold. Once you learn the structure, you can recreate it for any season, holiday, or occasion simply by changing the papers, colors, and greetings. From Christmas to Halloween, birthdays to thank-you cards, this fold works for them all.
A Stash-Friendly Tip
Don’t feel like you need the exact supplies I used. This design is perfect for using papers already in your craft room. Pull out a favorite patterned paper collection, choose coordinating cardstock and ink colors, and let the paper inspire your finished card.
Sometimes the most beautiful cards come from shopping your stash first!
Watch the Replay
If you’d like to see this W-Fold card come together step by step, be sure to catch the video replay. You’ll see exactly how the folds are created, how the panels are assembled, and how a few simple layers can transform Christmas paper into a stunning dimensional card.
Happy crafting!
What theme would you use for your own W-Fold card: Christmas, Halloween, birthday, or something else? Let me know in the comments!