


An Advent calendar has long been a joyful way to count the 24 days leading up to Christmas. Traditionally, Advent calendars begin on the first day of Advent or on December 1, and they often feature manger scenes, Saint Nicholas, or winter landscapes. Today, Advent calendars come in every theme imaginable — sports, technology, toys, crafting — and in every form, from simple paper flaps to fabric pockets to beautifully crafted wooden boxes.
Over the years, I’ve loved creating Advent calendars for my grandchildren, nieces, and nephews. There’s something magical about giving them a handmade countdown filled with tiny surprises — a way to build excitement and anticipation for Christmas in a meaningful, creative way.
My Book‑Style Advent Calendar
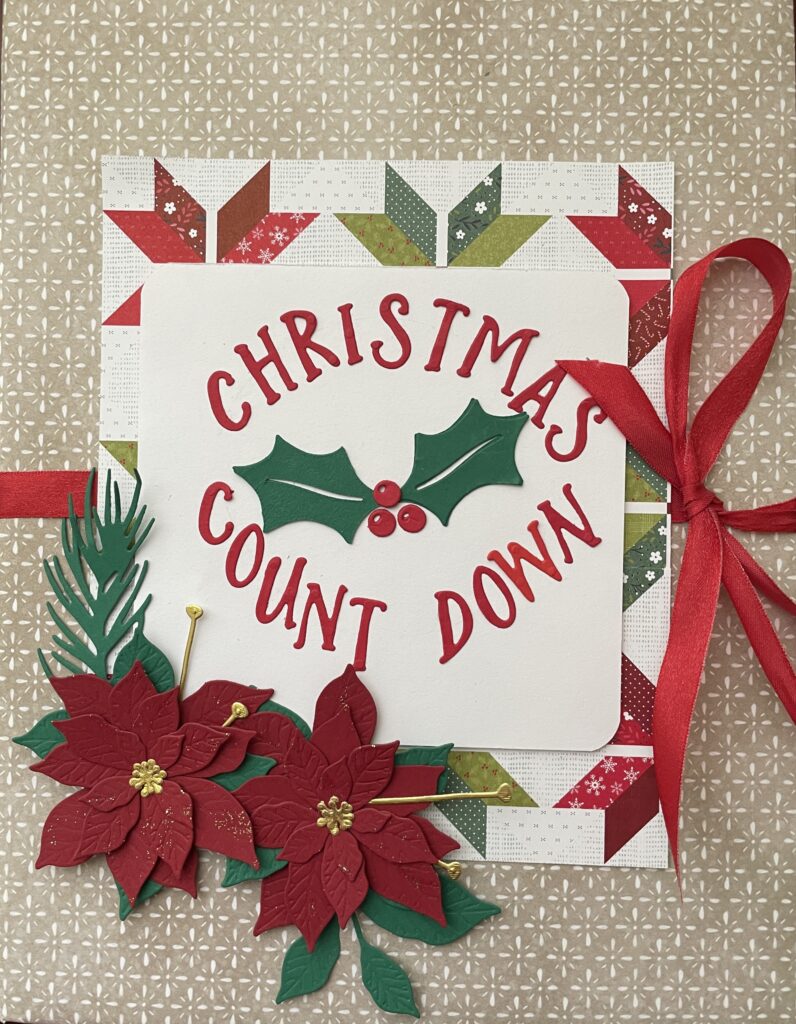
For my handmade version, I create the Advent calendar like a book. The outside is made from sturdy tag board or poster board, wrapped in festive Designer Series Paper from my stash. Inside the book, you’ll find 24 little boxes, each decorated and numbered from 1 to 24. Every box opens like a tiny pizza box and holds a treat — candy, a small toy, a hair ribbon, a piece of jewelry, or any fun surprise that fits the moment.
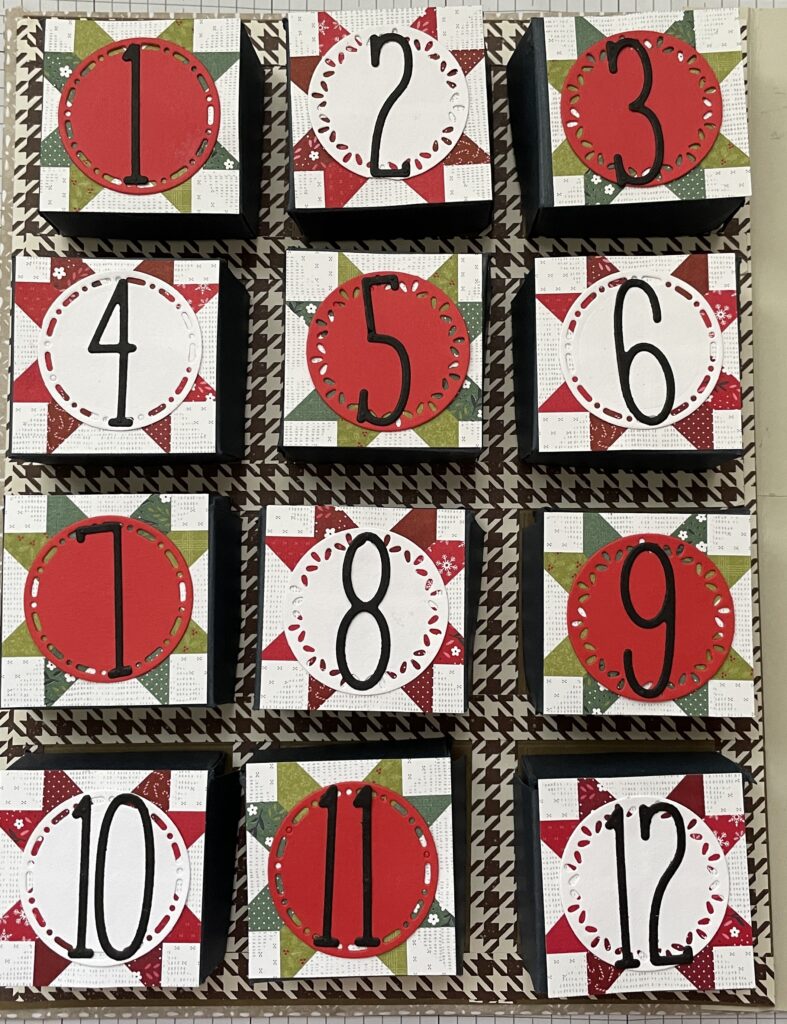
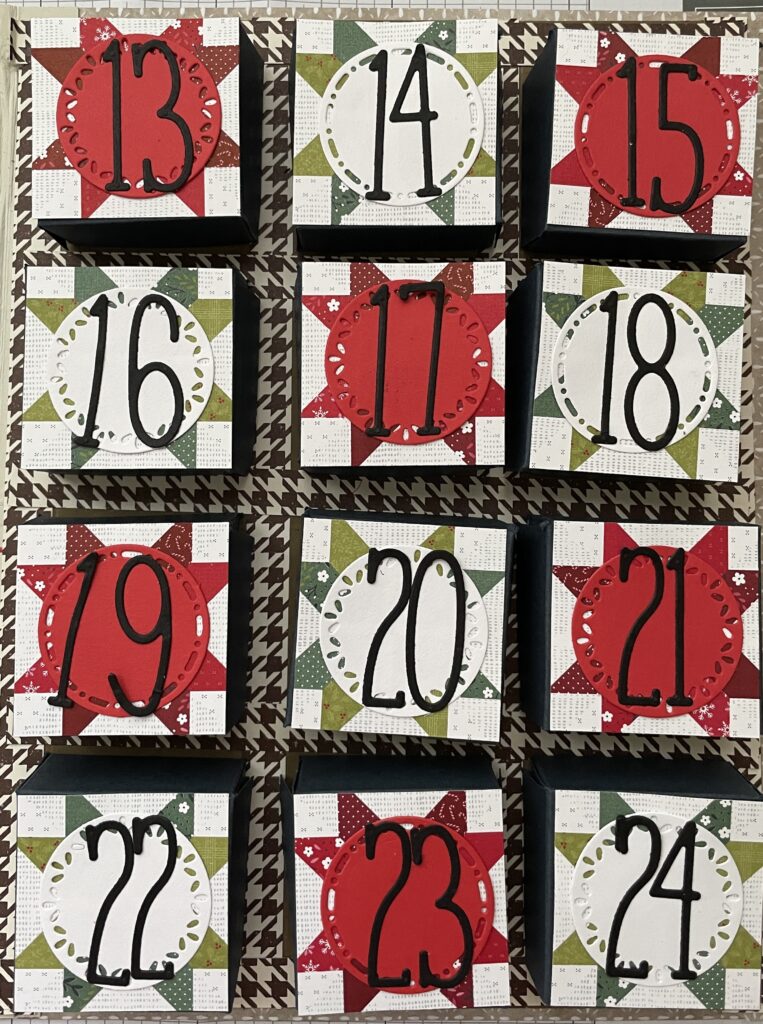
This year, I created a special Advent calendar as part of my Christmas Mini Series. Instead of filling the boxes for kids, I’m using this calendar to surprise my email subscribers with creative gifts. Each day I open a box during my videos, and one lucky subscriber receives the surprise tucked inside.
📦 Items & Measurements
- DSP sheets: 2 sheets of 12″ x 12″ DSP — I used Peaceful Garden (retired), but any festive DSP works beautifully. These will cover the outside of the book.
- Tagboard covers: 2 pieces, 8‑¼” x 10‑¾” — these form the front and back covers.
- Tagboard spine: 1 piece, 2‑¼” x 10‑¾”. If you don’t have tagboard, use the backing sheets from DSP packs or a cereal box cut to size.
- Cardstock & embellishments: I used A Stitched Season DSP, holly leaves and berries, Basic White cardstock, and À La Mode Alphabet dies for the front cover.
- Ribbon closure: Red ribbon works beautifully.
- Inside panels: 2 sheets of coordinating cardstock, 8″ x 10‑½”. These line the inside and serve as the base for the boxes.
- Spine liner: 1 piece of cardstock or DSP, 4″ x 10‑¾”.
- Box cardstock: 24 pieces of 4″ x 7″ cardstock — I used Secret Sea.
- Decorations: 2″ circles (Spotlight on Nature dies), twenty‑four 2″ x 2″ squares of Stitched Season DSP, and die‑cut numerals (À La Mode dies in Basic Black).
- Tools: Paper trimmer/scoring tool, bone folder, multipurpose liquid glue.
📚 How to Prepare & Assemble the Book
✨ The Small Boxes
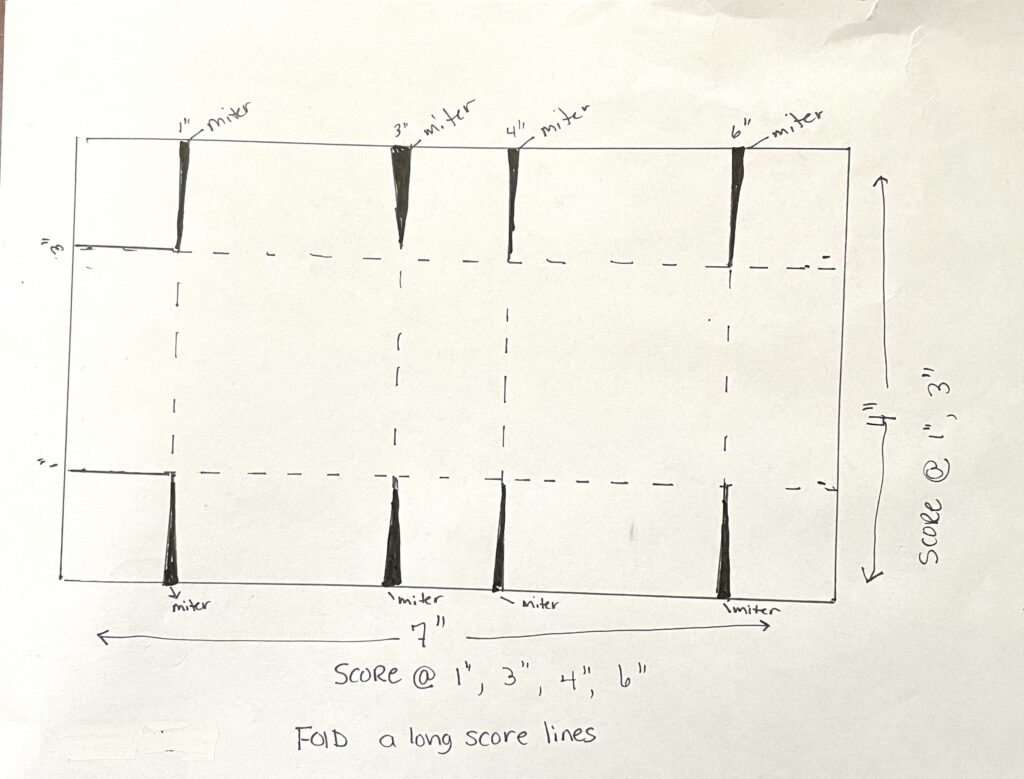
- Score the cardstock With the 7″ side at the top of your trimmer, score at 1″, 3″, 4″, and 6″. On the 4″ side score at 1″ and 3″. Repeat for all 24 pieces.
- Cut the tabs With the 7″ side facing upward, cut along each score line up to the intersecting score line. Rotate and repeat on the opposite side.
- Miter the tabs Trim small diagonals off each tab for easier folding.
- Fold all score lines Use your bone folder for crisp creases.
- Form the box sides With the 4″ side facing upward, fold the first set of tabs inward. Glue them to the next longer tabs to form the walls.
- Build the box structure Fold and glue the tabs from the 3″ and 4″ score lines onto the same area. This creates the open box.
- Create the box top Rotate so the open box is at the top. Fold in the remaining tabs, glue, and adhere to close the top. You now have a three‑sided lid that fits over the open box.
- Repeat for all 24 boxes.
Here is a template for boxes.
🎄 Decorating the Boxes
- Adhere the 2″ x 2″ DSP squares to each box top.
- Layer 2″ circles on top. I alternated red and white circles so even numbers had one color and odd numbers another.
- Add die‑cut numerals to finish.
- Set the decorated boxes aside until ready to adhere inside the book.
📖 Assembling the Book
- Prepare the cover DSP Place the two 12″ x 12″ DSP sheets side by side. If directional, check orientation. Trim one sheet to 12″ x 10″ (remove 2″ from the side, not the top). Flip one sheet over and adhere to the other with a 1″ overlap, creating a 21″ wide piece.
- Attach the covers and spine
- Place one 8‑¼” x 10‑¾” tagboard piece on the left side, leaving ½” side margin and ⅝” top/bottom margin.
- Place the second tagboard piece on the right side with the same margins.
- Position the 2‑¼” x 10‑¾” spine piece between them, leaving a small gap for folding.
- Adhere all pieces to the DSP.
- Cover the spine Adhere the 4″ x 10‑¾” cardstock/DSP over the spine.
- Condition the folds Gently fold each side inward to train the book folds. Pre‑fold DSP margins on all sides, miter corners to reduce bulk, then adhere with Tear & Tape or double‑sided tape.
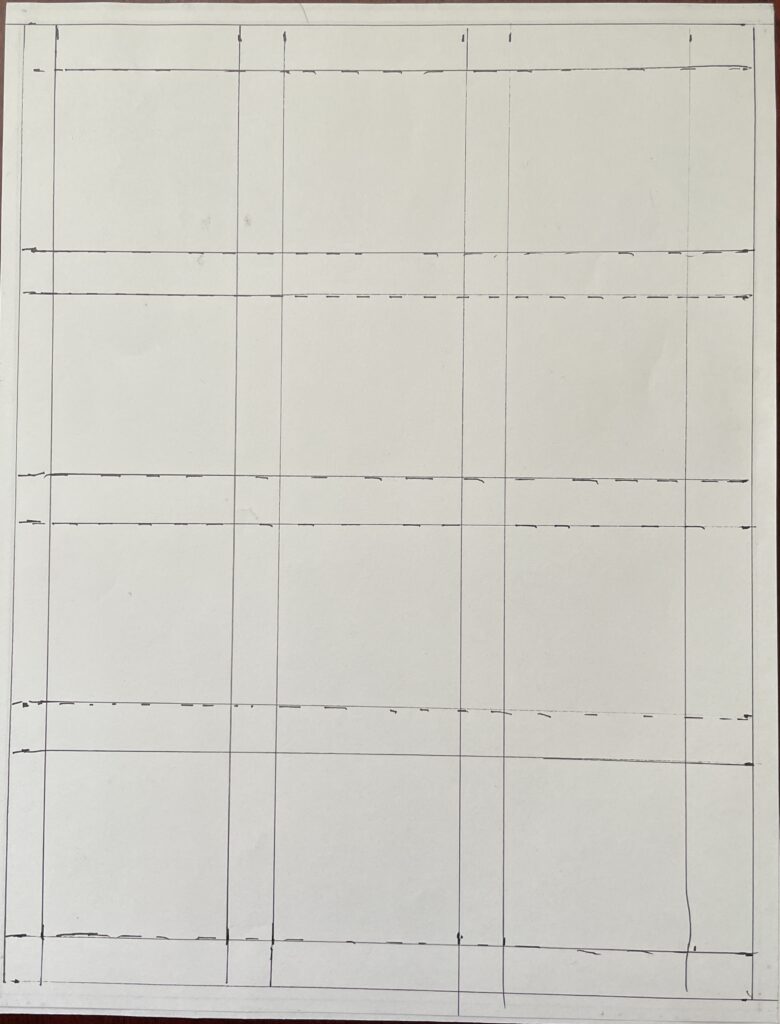
- Line the inside panels Score each 8″ x 10‑½” cardstock sheet:
- On the 8″ side: score at ½”, 2‑½”, 3″, 5″, 5‑½”, and 7‑½”.
- On the 10‑½” side: score at ½”, 2‑½”, 3″, 5″, 5‑½”, 7‑½”, and 8″. Repeat for the second sheet.
- Add strips for reinforcement Adhere ½” x 8″ strips between score lines on the 8″ side. Adhere ½” x 10‑½” strips along the 10‑½” side score lines.
- Attach panels to the book Adhere one finished panel to the left inside cover and the other to the right.
- Add the boxes Adhere each decorated box to the 2″ x 2″ squares inside the book, ensuring the tops open upward.
- Finish the cover Decorate the front with your chosen embellishments and add the ribbon closure.
Here is a template of the inside sheets:
🌟 Pro Tips for Box Making
- Use lightweight cardstock Heavier cardstock can crack when folded repeatedly. A medium weight (65–80 lb) is sturdy but still folds cleanly.
- Score before cutting Always score all lines first, then cut tabs. This keeps your measurements consistent and prevents shifting.
- Miter generously Don’t be afraid to trim tabs at a steeper angle. It reduces bulk and makes corners fit snugly.
- Burnish folds twice After the first fold, run your bone folder again. Crisp folds give boxes a professional finish.
- Glue sparingly A thin line of multipurpose liquid glue is stronger than a thick layer. Too much adhesive can warp cardstock.
- Dry fit before gluing Assemble the box without glue first to check alignment. This prevents mistakes and saves cardstock.
- Alternate box colors Mixing two coordinating colors (like red and green) makes the calendar more festive and helps kids spot numbers easily.
- Reinforce with strips If your cardstock feels flimsy, add a ½” strip inside the box walls for extra strength.
- Decorate flat Add DSP squares, circles, or numbers before folding the box. It’s easier to press embellishments flat.
- Condition folds Gently bend each score line back and forth before assembly. This prevents cracking and makes folding smoother.